 DockThumb
Tile Mac windows from the keyboard. No more dragging edges.
Window tiling means snapping windows into halves, thirds or a grid so they share the screen without overlapping. On a big display or a laptop with two apps side by side, it saves a lot of small mouse moves.
What macOS does by default
Since macOS 15 Sequoia, you can drag a window to a screen edge to snap it, or use the Window menu › Move & Resize. That covers halves and quarters. There are no thirds, no layouts for several windows at once, and no way to sort every window of a type into a grid.
How it works in DockThumb
- All shortcuts sit on ⌃ ⌥ and follow your keyboard layout, AZERTY included.
- Arrows for halves and full screen, 1, 2, 3 for thirds, U, I, J, K for corners.
- Whole layouts at once: two or three columns, main window + stack, or a grid.
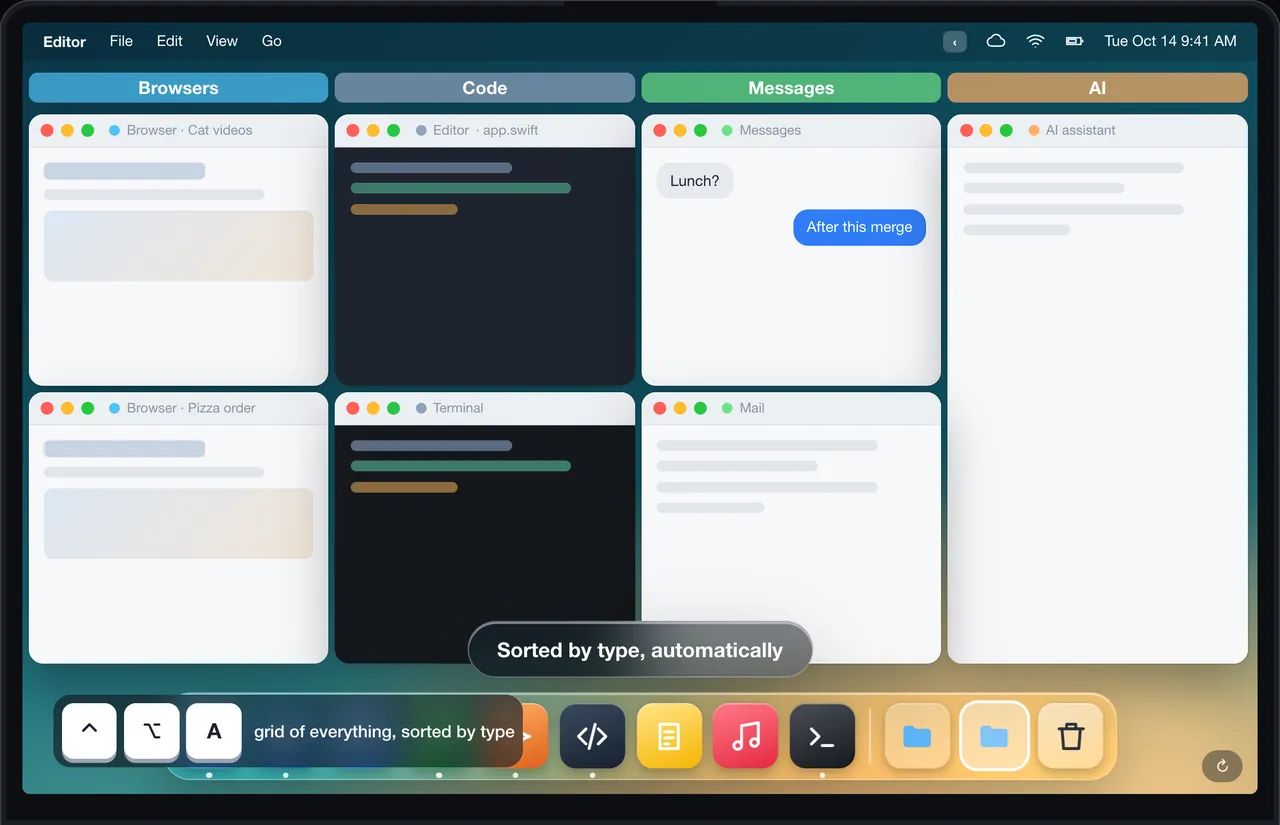
- ⌃⌥A sorts every open window into a grid by type. ⌃⌥Z undoes the last layout.
Shortcuts
| Keys | What it does |
|---|---|
| ⌃⌥ ← → | Left or right half |
| ⌃⌥ 1 2 3 | Thirds |
| ⌃⌥A | Auto-grid by type |
| ⌃⌥M | Minimize all |
| ⌃⌥Z | Undo the last layout |
Every shortcut can be changed in Settings.
What it looks like in DockThumb

Questions
Does macOS have built-in window tiling?
Yes, since macOS 15 Sequoia: drag a window to an edge, or use Window › Move & Resize. It handles halves and quarters. A tiling app adds thirds, multi-window layouts and faster shortcuts.
What is the keyboard shortcut to split the screen on Mac?
With DockThumb, ⌃⌥← and ⌃⌥→ put the active window on the left or right half. On macOS 15 and later without an app, the Window menu lists the native tiling commands and their shortcuts.
Hover it. Press a key. That’s the trick.
$4.99 once, no subscription, no account, 14-day refund. macOS 14 or later on Apple silicon.